SOL ULTIMUS
The Eclipse War — the compendium: sun and moon, their heroes, armies, monsters and the powers between them
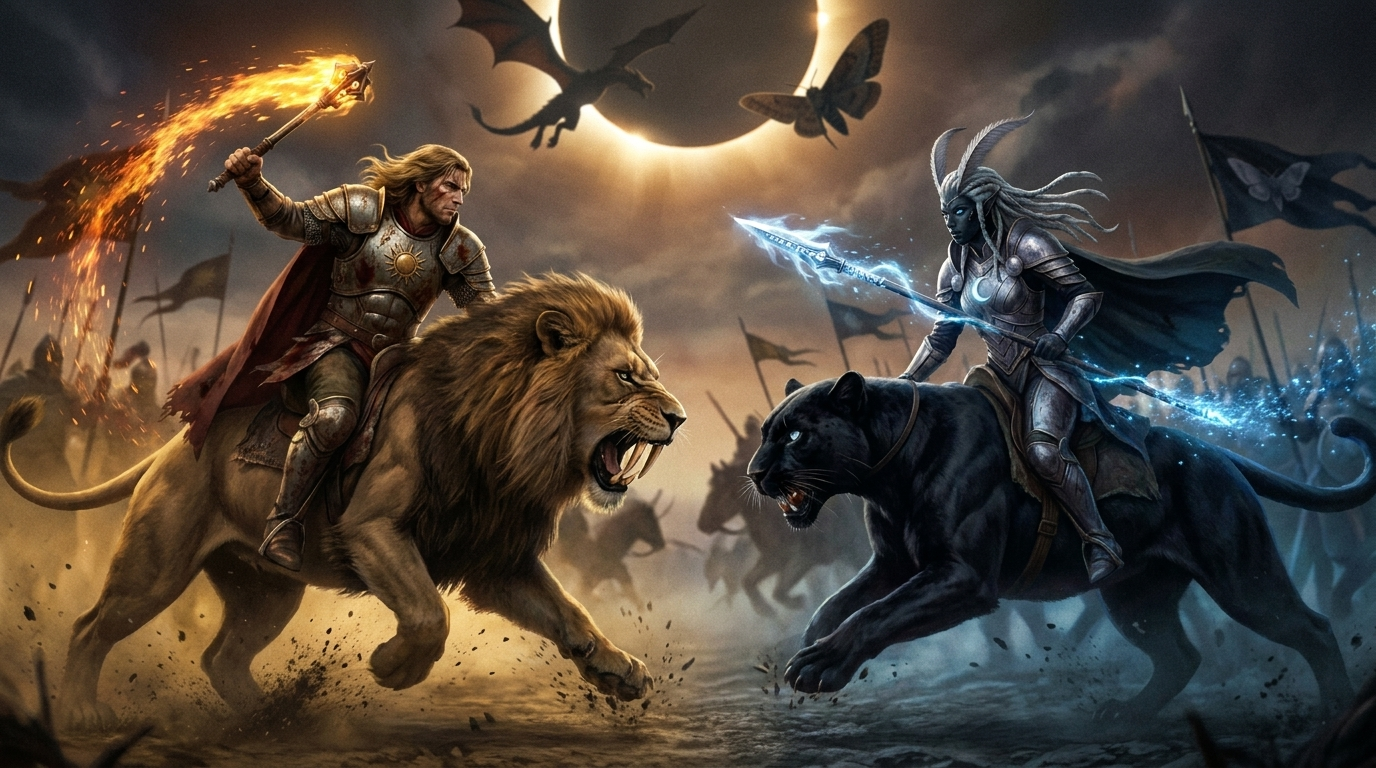
A realm of sun, steel and order. They build heavy in stone - a squat keep, a rough fieldstone wall with a wooden palisade, a single watchtower - they march in line and trust what they forge themselves. Their banner is crimson with a golden sun disc, and that disc rides on every breastplate, every wall and every tower. The sun is not only their sign but their strength: under the sun they strike harder, and their relic is a stone full of caged fire.
A kindred of moon, silence and old magic. They build not in stone but in living wood: a hall grown into the foot of an ancient tree, dark curved beams, a roof of bark, a palisade of bound stakes, and a lookout platform high in the branches. No ivory towers - moss, ferns and blue runes burned shallow into the wood. Their banner is violet with a silver crescent. The moon gives them their strength as the sun gives the Humans theirs - at night they strike harder - and their relic is not a stone but a living tree.
SOLUNOR is not two names side by side but a single word: sun and moon, once one crown that broke apart. The old sigil still carries it - a sun disc that darkens quietly into eclipse as evening falls and comes back out as a crescent moon. By day, whoever fights under the sun strikes harder; by night it is the moon. That turning has held in balance since living memory, until Ser Aldric the Bold and Malakar the Dread both decide to pull the balance to their own side. The campaign is the war that follows, and it begins with a boat: three men run up on the sand of a foreign coast because WARLORD TIBERON and an old sun wizard sent word that they were standing under the eclipse almost alone. From that beach it runs to a stolen egg, to a duel between two paladins, to a sun that finally comes back out - and to one last mountain road under it. Every player walks the same twenty chapters; only the enemy changes.

The numbered stops are the twenty chapters below, in the order you march them: out of the mire where the egg lies in its ring of stones, north to the sun temple on the coast, back east across the heath to your fort and your village, up into the moonwood and over the pass, on to their moon tree and their war-camp, and further east to the cyclops' cave. Then south again — the siege of your own fort, the temple on the moor, the caged wizard in his tower and the sunstone on the plain — before the road turns north-east once more: the last camp, the dragon's roost, the burning peaks, the valley of walls, and at last the warlord's citadel and the spiral mount. One stop is missing from this list on purpose: the moon altar in the north-west, where the war will end.
It begins with a boat. Three men come ashore at first light on a foreign coast — your paladin and two men-at-arms, and nothing else. WARLORD TIBERON and the old sun wizard sent for swords: the Moon Elves have pulled an eclipse over this land that will not lift, and the two of them stand under it almost alone. Your first errand is a small one. A dragon egg lies out in the mire beyond the ravine with poachers camped on the nest — slip the watch, wolves and highwaymen alike, and carry the egg out yourself. Each people finds its own egg in its own way: for the Humans a cracked orange stone, for the Moon Elves a mother-of-pearl moth cocoon.
The egg is out of the mire, but it still has to hatch — and they come to break it before it does. Night, a nest and three minutes: dig in around the shell, mine what gold there is and raise men-at-arms and archers. No knights yet; this is where you first learn to draw a line and make it hold. When the time runs out the egg opens, and the dragonet that crawls out follows you for the rest of the war.
Your first post to keep. Evening on a lone spiral mount, a small domed sun temple on the summit and one road winding up to it, with six waves climbing out of the dusk. You have the paladin, the hatchling, one man-at-arms — and a purse of 320 gold. The temple's stores are open from the first minute: it lets down a ballista on wheels for 300 gold whenever you can pay, and a second after that, never more than two. A cart is useless empty, so click a man onto it. Stand near the temple and its light slowly closes your wounds. There is only the one road: down it, and up it.
From a temple you cannot leave to a keep of your own: march to the fort and hold it five minutes, your young companion already fighting at your side. Toward the end of the watch their champion rides out himself, and he carries their crystal with him. Beat him down to a quarter of his life and he gives it up — he drops it and flees, and his whole assault force turns and leaves with him.
Until now you have only been defending things. The first true meeting comes at night: the enemy finally shows itself and breaks out of the forest over your village. Beat off the raid, raise an army from your own keep, and then march into the wood to find their hidden keep and level it. From here on this is no longer an errand but a war between two peoples.
A war needs more than soldiers, so the road turns aside into deep, troll-haunted forest with one lonely bridge across the river. No keep and no army here — only a hunt. Track the Great Bear, thin the pack around it, and then face the beast itself. On its carcass lies the first of the four things that make your hero more than a soldier.
Back to the war, and to the lesson the whole campaign turns on. A narrow valley drowned in mist, your fort at the head of it, and two lines barring the way: a timber palisade and a wall of stone, each with a gate that opens for your men and shuts against theirs. They come up the pass in waves for six minutes. Mine gold, put archers on the walls, keep your workers mending the breaches — and a cart set on a wall section shoots over it. This is the war of walls in miniature, and the valley at chapter 18 is the same lesson three times over.
A wild mount prowls the open plain. Tame it with your hero and ride it — faster and fiercer than on foot — and only from the saddle do you see the enemy camp for the first time: its own small moon trees, two knights on guard, and their seer. Bring him below half his life and he freezes your whole company for twenty seconds before he flees. Run him down after that and the last of the four things is yours.
The enemy has put an order of knights into the field, and this is the chapter where yours answers: until now no knight would ride for you, and from here on you can raise them yourself. Upgrade your keep to stone, forge better armour, and tear down their war camp while their knights ride at your wall every few minutes. The only chapter where both sides see literally the same duel.
Word comes of something in the north-eastern wood that no patrol comes back from. A one-eyed cyclops lairs there with his whelps, twice the height of a man-at-arms, with a studded club the size of a tree limb. Every twenty seconds he smashes the ground and knocks six of your fighters senseless, and he reaches high enough to swat your dragon out of the air — so spread your line, keep moving, and do not send her in over his head. Behind the den stands a cage: walk your hero to it once the giant is down and the knight inside joins you for good.
The answer to all that comes for your own gate. Seven minutes, and this time it is the enemy who does the marching. Work your gold mine, raise your keep into the great citadel, put up towers, and hold against war beasts with archers on their backs, against their champion, and against a dragon overhead.
There is a second sun temple, far out on the eastern moor, low and half-drowned in fog, and the Moon Elves mean to put its light out as they did the first. No keep here and no mine — only the temple, the ring of stone around it and what you marched in with. Your paladin is too far from home for his bow and fights with the mace, but the temple sells him a ballista on wheels for 300 gold, two at most, and your man-at-arms is the crew. Six waves climb out of the mist and the last one brings their champion.
The old wizard who taught you Healing Light has been carried off. He sits caged high in the north-east with a black dragon brooding on the roof of his cage, and he is not to be reached head-on. Free two penned war beasts first, put your archers on their backs, and shoot the three wyrms down from outside their reach before your hero goes anywhere near the cage.
Each people keeps one living relic, and while you were in the north-east the enemy came to break yours. Far to the east it is already down to 45% of its light, with a war camp encamped around it. Break that siege: the moment your hero stands beside the relic it begins to heal itself, and everyone around it with it. Let it go out and the chapter is lost, however many soldiers you have left. Among the Moon Elves it is not a stone but a tree full of glowing leaves.
Then their last rite tears the dawn open: night falls and never lifts again. Your soldiers fight half blind in it and the enemy, drunk on moonlight, strikes a quarter harder. Only the torches of your camp hold a circle of light, and inside it shelters the wizard you just carried out of his cage, too spent to cast a thing while you guard him and your keep for fifteen minutes. Play the Moon Elves and the mirror holds: a sun that never sets burns in the sky instead.
If the night will not lift, you had better not walk into it alone. A dragon still lies as an egg on a rock among the lava: tame it first, then hold your great keep for five minutes against a superior force with the full-grown beast already beside you. It is the last step before you take the warpath yourself — from here on you never fight alone again.
Now you march. A full duel against the enemy warlord with every part of the game open, your dragon full-grown and the old wizard at your side. Razing his citadel is not enough on its own — his relic has to fall too, or his people will simply raise a new warlord in his place. Play the Humans and Malakar the Dread stands against you; play the Moon Elves and it is Ser Aldric the Bold before your keep. And even as the walls come down, the sky stays broken.
Their warlord is dead and it changes nothing: what is left of his host comes down the mountain road, and this is where you stop it. The valley of chapter 7 again, three times over and on a mountain scale — one road, your fort at its head and three gated lines across it, two of timber and one of stone. Every breach brings them a wall closer. Man them with archers, keep your workers repairing, and hold ten minutes; a ballista on wheels already stands before your gate.
Their citadel is rubble and the eclipse still hangs there, so everything they have left throws itself at your great citadel in one last tide. Hold it fifteen minutes under the darkened sky. You are not alone: the Warlord of the Sun Order, the old commander in his ornate armour, rides through your gate and fights at your side, a hero in his own right — though the light is and stays yours. Hold, and your Healing Light breaks the eclipse. The sun comes back, and the war is won.
The sun is back, but the mountain road is not yet clear: the goblins and orcs that fought under the eclipse have taken the last summit and mean to keep it. One mountain, one road, ten waves up a single track — cave trolls from the seventh, the Goblin King with the tenth. There is no mine: the fallen drop their gold on the road and it fades after ninety seconds, so you sweep it up between waves. Click the four tower sites to raise and reinforce watchtowers — your mason does all the building, one job at a time — and the fort sells the same ballista on wheels for 300 gold. Roll one to a stone tower and it climbs onto the roof, where it shoots further and faster than it ever does on the ground.
Held in a cage behind the giant cyclops' den - clear the den and he joins you, one chapter before you learn to raise knights of your own. The same armor as any other knight, but a shade darker and more battered from his captivity, his face visible under the helm rim and a full copper-red beard. His blade glows from the first moment.
420 life / 40 damage against 280/28 for a common knight - plainly stronger than the men he leads.
Slay the Giant Cyclops - 420 hp - 40 dmg - glowing swordSer Gareth's mirror in the Moon Elves' own version of the same chapter: a Moth Master, caged behind the same giant cyclops. Her closed moth-mask helm is deep black metal, cracked and battered by captivity, with great broken antennae and eye lenses that glow a cool pale blue.
Play the campaign as a Moon Elf and she is the champion you cut out of the cyclops' den: the same place in the story and the same strength as Ser Gareth, but with her own name, her own face, and a spear that gives cold moonfire instead of gold.
420 life / 40 damage against 280/26 for a common Moth Master.
Slay the Giant Cyclops (Moon Elf side) - 420 hp - 40 dmg - glowing spearThe old commander of the Sun Order - the man who sent for swords in the first place, and the voice behind the eclipse that hangs over the whole crusade. He does not lead from a keep: he fights beside you in the last siege, and he is the only ally who heals.
His Sun Horn sounds every forty seconds and mends every ally within ten paces. On the field he is heavier than any knight and swings nearly twice as fast as the enemy champion: 55 damage per second against 34.
The Return of the Sun - 950 hp - 44 dmg - Sun Horn every 40 s| Spell | What it does | Cooldown | ||
|---|---|---|---|---|
| Q | SmiteShadow Rend | A targeted strike on the nearest enemy within 4.5: 2.5× your hero damage in a single blow. Taken from the treasure chest in chapter 1. |
9 s |
|
| W | Hallowed GroundLife Drain | Humans: +90 health for everyone within 12, plus an afterglow. Moon Elves: drains 70 health from the nearest enemy and hands +70 to the whole company. From the cleric in chapter 6, so you have it from 7. |
24 s |
|
| E | Aegis of LightVeil of Shadows | Five seconds of total invulnerability. No sword, no arrow, no dragonfire gets through. From the seer by the bridge in chapter 10, so you have it from 11. |
75 s |
|
| R | AscendantAvatar of Night | For twenty seconds your hero swells into a giant: double damage, far harder to wound, and he begins with health fully restored. Hero level 6 · from the seer in your fort in chapter 16, so you have it from 17. |
140 s |
|
| X | Power of the SunMoon Eclipse | The ultimate. For fifteen seconds your whole army hits 25% harder, and the sky turns with it. Hero level 9 · a gift from the caged wizard, so not before chapter 14. |
180 s |
| Power | What it does | Cooldown | ||
|---|---|---|---|---|
| Q | Pounce | A savage dive onto the nearest enemy within 10: 80 damage and two seconds flat on the ground. | 35 s | |
| W | Roar | Every enemy soldier within 9 turns and runs and stops fighting back for a few seconds. It cracks open any siege. | 45 s |
| Power | What it does | Cooldown | ||
|---|---|---|---|---|
| Q | Veil | Twenty seconds invisible. Anyone aiming at him loses sight of him at once, but the veil drops the moment he strikes. | 75 s | |
| W | Petrifying GazeFreezing Gaze | Every enemy within 13 locks up for seven seconds, turned to statue (Humans) or ice (Moon Elves). Seven free seconds of hitting a whole army. | 120 s | |
| E | Burning SunFrozen Moon | Sears away a quarter of current health from every enemy within 13. It never kills on its own; it sets a whole army up for the killing blow. | 150 s | |
| R | WardstoneMoon Sapling | Plants a temporary shrine just ahead of him: for twenty seconds your whole army hits 10% harder and heals 5 health per second. Then it crumbles away. | 110 s |
| Dragon power | What it does | Cooldown | ||
|---|---|---|---|---|
| Q | Fireball | A targeted sea of fire on a point within 16: 90 damage in a radius of 4. Every dragon but the storm dragon commands it; your own companion from stage 2. | 60 s | |
| W | Wing Buffet | One mighty beat: every enemy within 10 moves at half speed for seven seconds. The storm dragon carries it on Q; your own companion learns it only at stage 3. | 55 s |
| Boss | Chapter | Own numbers | Boss multiplier | Chapter scale | What you meet |
|---|---|---|---|---|---|
| Club cyclops | Slay the Giant Cyclops | 2050 / 60 | ×2.35 life · ×2.15 damage | ×1.06 | 5107 life · 137 damage |
| The Great Bear | Slay the Great Bear | 1080 / 48 | set to 1300 / 54 | ×1.52 | 1976 life · 82 damage |
| The Goblin King | Save the Sunstone | 700 / 32 | set to 3400 / 70 | ×0.90 | 3060 life · 63 damage |
| Cave troll & cyclopes | The Spiral Mount, last waves | 1450 - 2050 | ×1.9 as the wave giant | ×0.66, then re-weighted | about 930 life - see below |
Two things no card can show. The mountain re-weighting: on the spiral mount every creature is weighed a second time so the chapter keeps the balance it was tuned on - a club cyclops walks up there at roughly 930 life, not 2050, because that is the number ten measured rounds were built on. Make a cyclops stronger everywhere else and that mount stays exactly as hard. Reach into the sky: the boss of chapter 10 can strike flying units, which no other ground creature can - park your dragon above him and you lose her. His orcs ring the den with throwing spears for the same reason.
Man-at-Arms → Knight, 2.0×. Pikes stop riders. Four men-at-arms (400 gold) sweep a knight off the field before he lands his second blow.
Knight → Archer, 1.75×. A knight is not there to fight a front line but to ride around it. At speed 4.5 he runs down every archer.
Archer → Man-at-Arms, 1.75×. Arrows find the gaps in a shield wall.
Archer → thick hide, 1.8×. Rhino, boar, battle cat, bear, cave troll and every dragon. This takes an archer from 8 to 14.4 damage per supply point against beasts - far above the knight. Without archers you simply have no answer to a war beast.
Both sides get exactly the same bonuses: the Moon Elf warden counts as a man-at-arms, her archer as an archer, her spear knight as a knight.
Put two archers on the back of your rhino and you have a moving tower with 1400 health. The archers keep their range of 8 from a mount that carries 350 health per supply point, and with the 1.8× bonus they sweep enemy beasts away while the rhino tears down the wall. This is the trick that wins chapter 13: from that back they shoot farther than a dragon can reach.
The petrifying gaze holds every enemy within 13 for seven seconds. Follow it at once with Power of the Sun and your whole army hits 25% harder on targets that cannot strike back. Seven seconds of free damage from a full army decides any engagement. With 120 and 180 seconds of cooldown you get this twice per battle at most, so save it for the moment their army truly stands in front of you.
Burning Sun strips a quarter of current health from everyone in sight, but it never kills. That is exactly why it belongs before a volley: a line of six archers clears a scorched army in the time it takes to fell one healthy target. Against a cave troll at 1950 health, that single cast is worth nearly 500 damage.
Your catapult throws 14 far and holds 160 health - it dies to any enemy that reaches it. Let the cat roar: everything within 9 runs and stops fighting for a few seconds. Those are exactly the seconds your catapult needs to reload and finish the gate.
Raise Aegis, walk straight through their front line until you reach their archers and priest, and only then unleash Ascendant: it heals you to full and doubles your damage. Your hero butchers the soft rear while their men-at-arms are still turning around. But with 75 and 140 seconds of cooldown this is one attempt per battle - miss their archers and you stand alone inside their army.
The cheapest army that holds its ground. Footmen are the best damage per gold in the world and they take the blows; the archers stand behind them and counter both their men-at-arms and their beasts. Add one priest and a trade of blows becomes a war of attrition that you win. Roughly 12 supply - that leaves room for a rhino or a catapult.
Towers reach 10, your catapult 14. Park it just outside the tower ring, plant a few men-at-arms in front of it against sorties, and take the fort apart without ever being shot back. With Alchemist's Fire (250g at the smithy) it also shreds any knot of troops that comes to look.
With a rider in the saddle the cat hits 1.8× as hard - 59 damage per second - and your hero still casts from its back. You get speed 5.6, 900 health to shelter behind and the whole spellbook in a single unit. Do this the moment you have the cat: alone it is a good unit, with the paladin aboard it is the most dangerous unit in the world.
Three wardstones stand around every keep: +5% damage each and 2.2 health per second on top. Fight at your own fort and your army hits 15% harder while it heals through the battle. Have the seer plant his temporary stone among them and you sit at +25% with 5 health per second for twenty seconds. Defending really is stronger than attacking here - force them to come to you.
In Save the Sunstone (chapter 14) the shrine is not an altar but the objective itself: 6500 health, you begin at 45%, and the moment your hero stands beside it the light comes back - it heals itself for 10 health every 2 seconds and everything of yours within 11 paces for 9 health per second. So set your line around it, not in front of it.
An angular monolith of dark rock on a cracked plinth, cut by deep fissures that burn with fierce orange-gold light, as if a furnace were sealed inside, and a sun disc engraved on the flat face.
This is your altar: here your people call a fallen hero back. One per commander, 900 health, and it always stands in the open - trees and bushes keep nine paces away. Lose it and your hero stays gone.
320 gold · 900 health · one per commanderA slender old tree with smooth silver-violet bark, blue rune spirals creeping around the trunk, a broad root base, and a crown of glowing blue-white leaves, every leaf burning from within like a lantern. No moon ever hangs in its branches - the light comes from the wood itself.
Same role, same numbers as the Sunstone: the altar where your hero returns.
320 gold · 900 health · one per commanderThree stand around every keep: lightstones for the humans, moon saplings for the Moon Elves. Every stone still upright gives your army +5% damage and heals your units for 2.2 health per second within a radius of 11. Three stones is therefore +15% - which is why defending at your own keep is genuinely stronger than attacking.
They hold 420 health and the enemy attacks them on sight, exactly as your troops attack theirs. When they fall, they vanish quietly - no rubble, no sound.
The seer plants a fourth stone just ahead - a lightstone or a moon sapling - that lasts twenty seconds. While it stands, your whole army hits 10% harder and heals 5 health per second: by far the strongest healing in the game. At your own keep it stacks on top of the three permanent stones, so for twenty seconds you sit at +25%.
The only item that differs by people: the humans receive a lightcrystal in a golden sun setting, the moon elves a mooncrystal in a silver crescent. Their champion carries it: in Hold the Fort he leads one last assault on your wall. Drive him below a quarter of his health and he drops the crystal and pulls back - and his whole host turns away with him.
This is what sets your hero's weapon burning: the holy glow around the mace, the flame around the moon spear. Without the crystal your weapon stays dull - that is the rule everywhere now, the first chapter included. On top of that, your hero swings it 15% faster.
Hold the Fort · weapon glow + 15% attack speedHeavy gold shaped into a roaring bear's head, an amber stone set in its jaws. It falls from the Great Bear the moment the beast goes down - nothing else is asked of you but winning the hunt.
+25% health on your hero. A paladin of 600 rises to 750, and the bonus scales with every rank he earns after that.
Slay the Great Bear · +25% healthA rough blue-green stone held in weathered silver claws, troll runes cut into the rim. It waits in a chest on the way to the lair, beside the route and not on it: march straight for the troll and you miss it.
Spells recharge 20% faster. It works on all five of your hero's powers at once, so the more you cast, the more it gives back.
Slay the Giant Cyclops · -20% cooldownA short wine-red cape on two golden clasps. Only a commander wears it, and only after the field is his. It waits in the weapons chest at the heart of the knight camp - you only reach it by breaking the camp itself, right where their swords are sharpest.
+12% attack damage, and from the moment you take it, your paladin wears it on his back: this is the first find that changes what he looks like.
Break the knight camp · +12% damage · he wears itLeather and bronze, three steel claws running along the forearm, trimmed with cat fur. They are yours the moment the wild battle cat bows its head to you.
+20% damage on your hero - Smite included, since it strikes for 2.5× his weapon damage.
Tame the Battle Cat · +20% damageA closed golden helm with a blood-red crest, struck for a knight who never lived to wear it home. It lies in the armoury chest at the heart of their war-camp - you only get it by taking the camp, which is the chapter's third task anyway.
+15% health, and he wears it on his head from then on. Find both mantle and helm and he wears both together.
Take the war-camp · +15% health · he wears itThe seventh and last find, and the only one that changes how your hero FIGHTS rather than what he can take. It lies in a guarded weapon chest at the watchpost between the two keeps in the final duel - two knights and two archers stand over it.
From then on your hero can switch weapon: the flanged mace for armour-crushing blows up close, or the bow to shoot alongside his own archers. The mace simply moves to his back.
Guarded chest · switch mace ↔ bow| Rule | What it means | Value |
|---|---|---|
| Slots | Seven, one for each item a hero can bear. There are exactly seven items in the world, so a full set is the whole set - click your hero's portrait to see what he carries | 7 |
| Who carries them | The power settles on all of your heroes: the paladin and the seer alike | both |
| Traveling on | What you find stays with you through the later chapters of the campaign | yes |
| Against the computer | The first three lie in guarded chests along the diagonal (30,66 · 48,48 · 66,30), equally far from both keeps | 3 chests |
| Name | What it does | Cost |
|---|---|---|
| Base income | Every commander earns gold continuously, mine or no mine | +2 gold/s |
| Gold mine | +3 gold/s once it is yours, plus 1 for every worker digging in it. It runs dry after 6000 gold and then belongs to no one | capture |
| Watchtower | 300 health, 12 damage, range 10. 7 at most (2 at the start, 5 of your own building) | 100g |
| Shrine | 900 health - this is where your fallen hero returns. One per commander | 320g |
| Stone keep (level 2) | Unlocks the knight, the priest and the catapult | 250g |
| Citadel (level 3) | Unlocks the war beast and the battle cat | 300g |
| Better armor I | Everything you own takes 9% less damage | 150g |
| Better armor II | 18% less damage together - effectively 22% more health for your entire army | 300g |
| Alchemist's fire | Every catapult gains a burning boulder: 150 damage in a radius of 4.5, three-minute cooldown | 250g |
| Wardstone | Three per keep, 420 health each. Every stone still standing gives your army +5% damage and 2.2 health/s within range 11 | already standing |
| Army cap | 22 supply per commander. Heroes and dragons do not count | 22 |